Meson教程
本页从头开始展示如何为一个简单项目创建 Meson 构建定义。然后,我们将其扩展为使用外部依赖项,以展示如何轻松将其集成到项目中。
本教程主要针对 Linux 编写。它假定系统上有 GTK 开发库。在 Ubuntu 等 Debian 衍生系统上,可以使用以下命令安装这些库:
1
$ sudo apt install libgtk-3-dev
此外,建议使用 2.74 或更高版本的 glib 库。
也可以在 Windows 和 macOS 等其他平台上构建图形用户界面应用程序,但需要安装所需的依赖项。
最简单的开始
让我们从最基本的程序开始,经典的 hello 例子。首先,我们创建一个保存源代码的文件main.c。它看起来是这样的
1
2
3
4
5
6
7
8
9
#include <stdio.h>

//
// main is where all program execution starts
//
int main(int argc, char **argv) {
  printf("Hello there.\n");
  return 0;
}
然后,我们创建一个 Meson 构建说明,并将其放入同一目录下名为meson.build的文件中。文件内容如下
1
2
project('tutorial', 'c')
executable('demo', 'main.c')
仅此而已。请注意,与 Autotools 不同,您无需在源文件列表中添加任何源文件头。
现在,我们可以开始构建应用程序了。首先,我们需要初始化构建,进入源代码目录并发出以下命令。
1
$ meson setup builddir
我们创建了一个单独的编译目录,用于保存编译器的所有输出。Meson 与其他一些编译系统不同,它不允许源代码内编译。你必须始终创建一个单独的编译目录。通常的做法是将默认编译目录放在顶级源代码目录的一个子目录中。
运行 Meson 时,会打印出以下输出结果。
The Meson build system
 version: 0.13.0-research
Source dir: /home/jpakkane/mesontutorial
Build dir: /home/jpakkane/mesontutorial/builddir
Build type: native build
Project name is "tutorial".
Using native c compiler "ccache cc". (gcc 4.8.2)
Creating build target "demo" with 1 files.
现在,我们可以开始编译代码了。
1
2
$ cd builddir
$ ninja
如果你的 Meson 版本比 0.55.0 更新,你可以使用新的后端无关性编译命令:
1
2
$ cd builddir
$ meson compile
在本文件的其余部分,我们将使用后一种形式。
可执行文件生成后,我们就可以运行它了。
1
$ ./demo
这将产生预期的输出结果。
1
Hello there.
添加依赖项
只打印文本有点过时了。让我们更新程序,创建一个图形窗口。我们将使用GTK+ widget 工具包。首先,我们编辑主文件以使用 GTK+。新版本如下:
1
2
3
4
5
6
7
8
9
10
11
12
13
14
15
16
17
18
19
20
21
22
23
24
25
26
27
28
29
30
31
32
33
#include <gtk/gtk.h>

//
// Should provided the active view for a GTK application
//
static void activate(GtkApplication* app, gpointer user_data)
{
  GtkWidget *window;
  GtkWidget *label;

  window = gtk_application_window_new (app);
  label = gtk_label_new("Hello GNOME!");
  gtk_container_add (GTK_CONTAINER (window), label);
  gtk_window_set_title(GTK_WINDOW (window), "Welcome to GNOME");
  gtk_window_set_default_size(GTK_WINDOW (window), 400, 200);
  gtk_widget_show_all(window);
} // end of function activate

//
// main is where all program execution starts
//
int main(int argc, char **argv)
{
  GtkApplication *app;
  int status;

  app = gtk_application_new(NULL, G_APPLICATION_DEFAULT_FLAGS);
  g_signal_connect(app, "activate", G_CALLBACK(activate), NULL);
  status = g_application_run(G_APPLICATION(app), argc, argv);
  g_object_unref(app);

  return status;
} // end of function main
然后,我们编辑 Meson 文件,指示它查找并使用 GTK+ 库。
1
2
3
project('tutorial', 'c')
gtkdep = dependency('gtk+-3.0')
executable('demo', 'main.c', dependencies : gtkdep)
如果应用程序需要使用多个库,则需要为每个库单独调用dependency(),例如:
1
gtkdeps = [dependency('gtk+-3.0'), dependency('gtksourceview-3.0')]
在目前的例子中,我们并不需要它。
现在,我们可以开始构建了。需要注意的是,我们不需要重新创建编译目录,也不需要运行任何类似的神奇命令。相反,我们只需键入与重建代码完全相同的命令,而无需对构建系统进行任何更改。
1
$ meson compile
第一次设置好编译目录后,就不需要再运行meson命令了。只需运行meson compile即可。Meson 会自动检测到你对编译定义所做的更改,并处理好一切,用户无需操心。在这种情况下,输出结果如下:
[1/1] Regenerating build files
The Meson build system
 version: 0.13.0-research
Source dir: /home/jpakkane/mesontutorial
Build dir: /home/jpakkane/mesontutorial/builddir
Build type: native build
Project name is "tutorial".
Using native c compiler "ccache cc". (gcc 4.8.2)
Found pkg-config version 0.26.
Dependency gtk+-3.0 found: YES
Creating build target "demo" with 1 files.
[1/2] Compiling c object demo.dir/main.c.o
[2/2] Linking target demo
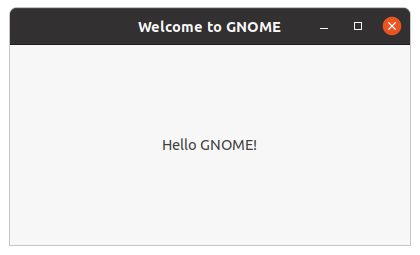
请注意 Meson 是如何注意到构建定义已发生变化并自动重新运行的。程序现在可以运行了:
1
$ ./demo
这将创建以下图形用户界面应用程序。